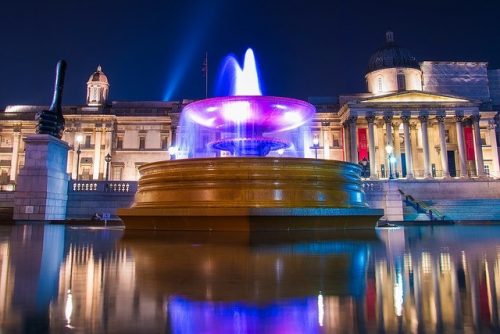
If you’ve mastered the art of daytime photography, and your indoor portrait photography is coming along nicely, it’s time to venture out into the night. We have some tips to help you capture the night and some awesome images. So when the sun goes down, get out your DSLR from Beachcamera.com and head out to the city or countryside for some great shots.

A Tripod is a Must
This is a non-negotiable tool for night photography. In order to capture the sharpest image possible with the least amount of noise (low ISO), exposure time will have to be longer than regular daylight photography. Use a good sturdy one like the Xit 60” Full Size Tripod from Beachcamera.com because anything too flimsy may move in the breeze.
Shoot in RAW
If you aren’t already recording your images in RAW format, then now’s a good time to start. Shooting in RAW format means you’ll be able to extract more detail later in post-processing.

Use Manual Focus
Even pro-quality cameras can have trouble automatically focusing in very low light situations. So look for the focus switch labeled “AF/MF” on the side of your lens and move it to “MF”. Now you can turn the focus ring until the desired portion of the scene is in focus. Because your subject may be far away or dimly lit, it’s best to use “live view” mode (your camera’s LCD screen) to see more detail. Modern DSLRs will allow you to zoom in multiple times, which is the key to ensure sharp night photos.
Use Built-in Timer
Pressing the shutter button on your camera will produce vibration, and vibration is the enemy of a crisp night photo. The way to avoid this is to use the camera’s built-in timer. The majority of cameras support 2 and 10-second timers and exposures of up to 30 seconds like the Nikon D3300 from Beachcamera.com.
Use the Correct White Balance
If you’re shooting in RAW and the white balance is off, you can usually recover that in post-processing. But why make more work for yourself? Changing the white balance from “auto” to “sunlight” will produce true colors for most night cityscapes.
Wide-Angle Lens
If you’re trying to create a different effect, or your night scene needs a little more excitement added to it, try using a wide-angle lens. It will help you capture more of the scene and create altered effects.
Put Away the Flash
Don’t use flash. The key to successful night photography lies in a long exposure. Flash requires light to bounce off a subject. If you are shooting at dusk or at night, and trying to capture a subject far away, your flash unit won’t reach it effectively.
These tips will give you a good start on your first night out on the town with your camera in hand.


