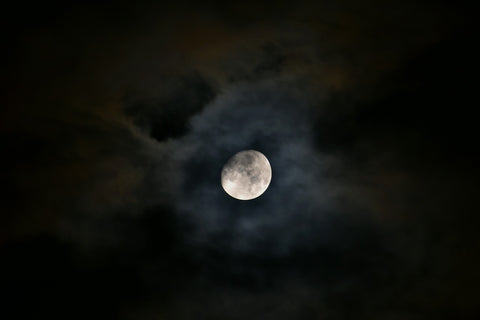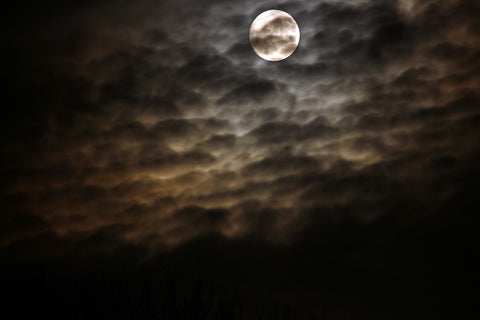
One of the most difficult lighting conditions is in moon photography. When taking photos of the moon in the night sky, grabbing great shots of the moon even in clear skies may seem like a daunting task. You may have previously tried your hand at shooting pictures of the moon, only to find that the exposure came out as a white blob. This and the different phases of the moon in your photography, for example when the moon is between the Earth and the sun, is called a “New Moon”. This is due to the lack of sun on the moon side facing the photographer. The Moon is “Waxing” when it is getting brighter and brighter and you will need to adjust for the ambient light from it.
There is also how to properly set up your camera. You want to have the right settings for shutter speed, ISO settings, Aperture settings and focal length on your lens. You also will need to make sure that your camera has good stabilization to help overcome camera shake and blur often associated with handheld photography. A sturdy tripod would help tremendously in further reducing and eliminating any possible camera shake.
These are all challenges that can be overcome with the right equipment, photography tips and tutorials.
A great starting point to get beautiful images of the moon is to begin with a great digital camera, full frame-mirrorless cameras or a DSLR camera from manufacturers like Sony, Nikon Canon and others. In addition to a new good camera you will want a top notch zoom lens so you can hit the magnification you need to get shot of the lunar surface with said long lens. Imagine you want to take some stills and video of the Milky Way having a super telephoto lens with exceptional zoom capabilities will get you that close up shot. Imagine being able to get detailed images of the moon’s surface and craters. A wide angle lens will get you more of the moon and the entire night sky scene in the exposure.

As we previously mentioned, there are several factors to getting the most out of your photos of the moon. Prior to our camera and lens recommendations we would like to review some tips and tutorials for beginners and enthusiasts alike, to take your moon photography to the next level.
Take amazing still photos and videos of the next Supermoon. This is when the full moon is closest to Earth and great for getting close up pics of a rare event.
Photos of another rare astrophotography item is that of taking photos of a lunar eclipse.
You can even try capturing great photos of the moonset in the morning hours during daylight. Because of the ambient light we recommend starting with an ISO 100 setting versus ISO 200.
Grabbing photos of the moonrise can also make for some gorgeous photos. You will get different moon looks depending on the time of the day, day of the month and month of the year.
Using a wide angle lens may make the moon appear smaller in your exposure as you are getting more of the entire scene in the frame. You should look at the magnification you need and use a zoom lens with a long focal length for close up shots. That way the surface of the moon and even it’s craters and mountains will show up clearly in your exposure.
Exposing for the foreground of the moon you shoot at night, if not done the right way to go as you may run into overexposed images as the surrounding landscape may be very dark. Conversely, if it it is brighter outside you don’t want to underexpose your image either.
Try using Photopills to plan your moon photoshoot as this will give you information on the moon, the Milky Way and sun locations for your photos. Another app which will provide helpful planning and even weather information for your planned photoshoot is Ephemeris.
Try shooting in manual mode or manual focus as this will give you more control over the camera settings than autofocus would. However, using autofocus for beginners is a great way to learn from the camera settings for your own knowledge and use in the future when shooting in manual focus.
Use the remote shutter release so you can concentrate on the liveview of the moon. If you don’t have a remote control for this, you can try using your camera’s photo timer to properly time the photo while you examine the scene.
Try shooting in Raw format as this will give more options in photoshop and post processing editing.
You can also look into purchasing a teleconverter which that fits between the lens and the camera to increase magnification.

We love the following cameras for anyone looking to grow with their moon photography. Having the right camera and setting it up correctly are some of the first steps in shooting photos of the moon.
We would like to start with the Sony a7 III Mirrorless Full Frame Camera Body + 28-70mm Lens Kit. Here are some of the features we love about this great DSLR camera:
The newly developed Advanced 24.2MP Back-Illuminated 35mm Full-frame Image Sensor for clear and vivid photos.
Amazing steady handheld shots with its built in 5-axis stabilization hardware.
4D autofocus with amazing frame coverage of 693 phase points and 93 percent of the image.
Enhanced autofocus for subject or object tracking. This is a great boon for beginners.
With the Focus Touch function onboard you can use the touch track pad to swipe back and forth in your scene while you look through the Electronic Viewfinder or EVF and concentrate on your shot.
Record in 4k HDR or High Dynamic Range with the HLG standard. This is the same standard used by many local and cable TV stations to achieve their High Dynamic Range.
The Sony a7 III uses a NP-FZ100 battery allowing you to shoot up to approximately 710 photos with one full charge. You can always purchase the Sony BC-QZ1 optional battery charger for super fast charging via USB-C.
Two memory card slots rated for SD cards at UHS II are available, so storage of your images and videos should not be an issue with the Sony a7 III.
This camera and lens kit sit on the Sony E-mount system. However, as this is an interchangeable lens camera, you can use any of the amazing Sony lenses (even from their Gold Master or GM line). If you would like to use a lens from a different manufacturer, you will need a mounting adapter as each manufacturer has their own proprietary mounting system.
With included bluetooth and Wi-Fi get ready to put your fantastic photos of the moon on your social media page. Upload them with ease using the Sony companion app.
Another top notch camera for moon photography is the Canon R6 Mark II Full-Frame 24.2 MP Mirrorless Camera with 24-105mm USM Lens Kit. This is an amazing DSLR camera and precursor to the Canon R8.
A full frame processor capable of 24.2 effective megapixel reproduction provides for sharp, detailed and crystal clear images.
High speed continuous shooting can be achieved at 40FPS with the mechanical shutter. Great for action photos that can be even taken in low light conditions with the moon perhaps in the background of your subject.
The Canon R6 can easily and effectively track subjects including hands, faces and eyes. This applies to animals as well! So how about a shot of a wolf or dog howling at moon? Well it will come through clear and precise.
6K oversampled cropped 4K videos can be taken with this camera up to 60 FPS. If you want to shoot in FHD or Full HD 1080P you can get up to 140 FPS. So smooth frame rate progression is definitely a plus on this camera.
The Canon R6 combines In Body Stabilization or IBIS with optical stabilization for 8 stops of stabilization to eliminate shake and blur associated with handheld shooting (even at lower shutter speeds).
With a 3 inch touchscreen Vari-angle LCD, you can find the sweet spot angle for your shot.
With Wi-Fi 5 or Wi-Fi AC able to connect to the speedy 5 ghz bands, plus bluetooth and wired connections via fast USB-C, you can easily connect to the Canon Connect Camera App to livestream your photoshoot of the moon. Uploading your content to social media can also be accomplished through the Canon Connect App.
Having the right lens to photograph the moon will be right up there in importance with your camera choice. Therefore, we would like to recommend the Sony FE 135mm F1.8 GM G Master Full-frame E-mount Telephoto Prime Lens.
This is a Sony GM lens or Gold Master lens. This is the highest of quality line of lenses from Sony. A tremendous amount of R&D and rigorous testing help produce the amazing Gold Master lenses.
This lens get you the zoom needed from a narrow depth of field.
High resolution found with this lens is maintained from corner to corner and edge to edge of your exposure area.
Super ED and ED glass elements provide dust and debris resistance, along with four XD linear focus motors to use the lens with fast, quiet and precise autofocus.
This telephoto lens will get you the magnification you need for great close up shots of the moon and the moon’s surface.
With it’s lightweight composition and ease of use to carry around due to it’s portable design, taking this lens on travel adventures to get some great moon photography really lessens the weight burden which many lenses of this focal length will have.
One of the accessories that we had talked about as having a good sturdy tripod. Here is the Targus Digital Tripod with 3-Way Panhead, 66-Inch to solve the problem of camera shake and blur. This is a three way panhead tripod which can extend to 66 inches at full height. Coupled with it’s ability to hold up to 7 pounds of camera equipment, its grip feet and carrying case make this a great sturdy tripod for beginners and professionals alike. This will help considerably when shooting the moon without worrying about the exposure being filled with blur.
Don’t be turned off by the challenges associated with moon photography. As in shooting during sunlight there are different circumstances and tutorials which help in each regard. Since you will be dealing with dark lighting conditions and the goal to get the most high quality shots of the moon as you can, use the tips and tricks and our equipment recommendations and you are off and running ready to take your photography skills to the next level.