#1 Practice Shooting Indoors

This Thanksgiving falls on November 26, 2015, and for much of America that means winter’s frigid embrace is right around the corner. Consequently most families will be spending Thanksgiving indoors, and that’s exactly where you want to practice shooting before the big Turkey Day feast. Set your camera’s ISO between 800 and 1600 to boost its sensitivity to light. Next adjust your white balance to the type of lighting found within your home—if you have incandescent or tungsten lamps, us the tungsten setting, if your lights are fluorescent the fluorescent white balance setting will work better. Check out our introduction to lighting for more tips on how to better tune your camera’s settings to the type of lighting you’ll encounter on Thanksgiving Day.
#2 Master the Backlight

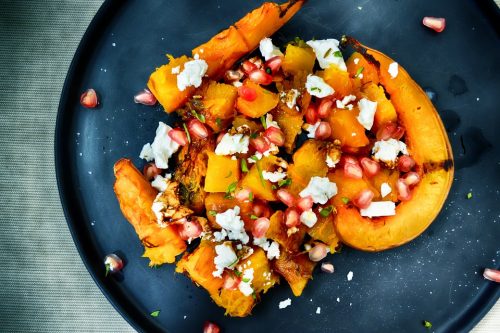
Once you’ve got a general feel for how to shoot better quality images indoors, there’s a little trick you can master to make all your food photos look more appetizing—the backlight. It is by far the best angle of lighting to use to capture the mouthwatering essence of food. A backlight brings out all depth, character, texture and dimension that makes food appealing, and as an added bonus, it also highlights any steam or smoke emanating from the meal. Professionals will use an assortment of reflectors, umbrellas and strobes to create the lighting they desire in the final composition of their image, but often times the natural light filtering in through your window is the best light to use in food photography.
#3 Use a Fast Macro Lens

#4 Use Fresh Ingredients as Props
It’s important to keep in mind that as a photographer you’re trying to tell a story with the lens—in the case of food photography that story involves the transformation of natural raw ingredients into culinary art. One way to tell that story is to accent the dish with the raw ingredients used to bring it into existence. Whether it’s placing cinnamon sticks, cloves and a baby pumpkin next to a slice of pumpkin pie or sitting a glass container of uncooked rice grains, fresh celery and carrots next to a bowl of chicken lentil soup, you can bring out the essence of a dish by juxtaposing the finished product with its origins. Just be sure to use fresh, visually appealing ingredients—since you’ll be taking high definition close-ups, every wrinkle, tear and flaw will be visible in the photo. Hide blemishes on vegetables and avoid unappealing ingredients, such as raw chicken breast when composing your shots. Keep in mind that if you’re photographing something like a salad on your plate, you can spritz it with water or olive oil to make the veggies glisten and look more appealing in the final composition.#5 Practice Action Shots Behind the Kitchen
Since you’ll be using fast lenses, and because the food is only half the story, practice capturing action shots from behind the kitchen while your family is preparing meals. The kitchen during Thanksgiving will be a very busy place, and if you’re not used to photographing large events it can definitely help to practice sneaking photos in crowded environments before the big day. Pay special attention to how lighting is distributed throughout the kitchen and where the best angles are for snapping candid photos. You don’t want to distract the cooks on the big day, so it helps to be familiar with your shooting location ahead of time. Above all else remember: this holiday is as much about family as it is about food; don’t forget to capture the human element when you photograph Thanksgiving Day!


